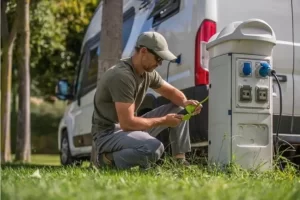
Are you tired of dealing with a tangled mess every time you need to use your extension cord? Do you struggle to keep it organized and easily accessible? If so, you’re not alone. Many people find themselves in a similar predicament, wondering how to properly roll up an extension cord without creating a jumbled mess. Fortunately, with the right technique and a little bit of practice, you can transform your chaotic cord into a neatly coiled masterpiece.
The Importance of Properly Rolling Up an Extension Cord
Before we dive into the step-by-step process of Rolling Up an Extension Cord, let’s first discuss why it’s important to do so correctly. Properly coiling your extension cord not only helps to prevent tangles and knots but also extends the life of the cord. Improperly stored cords can become damaged, leading to potential safety hazards and the need for expensive replacements. By taking the time to roll up your cord properly, you can save yourself time, money, and frustration in the long run.
Step-By-Step Guide to Rolling Up an Extension Cord
Now that we understand the importance of properly rolling up an extension cord, let’s walk through the process step by step:
- Prepare Your Work Area: Find a clean, open space to work in, free from obstacles or obstructions. Lay the extension cord out in a straight line to begin.
- Remove Any Tangles: Before you start coiling the cord, make sure there are no tangles or knots present. Untangle the cord as needed to ensure a smooth rolling process.
- Create a Loop: Grab the male end of the cord (the plug end) in one hand and hold it at waist height. With the other hand, start creating a loop by twisting your wrist in a circular motion.
- Continue Looping: Keep twisting your wrist in the same circular motion, gradually forming a coil as you work your way down the length of the cord.
- Secure the Coil: Once you’ve reached the end of the cord, secure the coil by wrapping the female end (the outlet end) around the center of the coil. This will help prevent the cord from unraveling.
- Store Properly: Store your neatly coiled extension cord in a dry, cool place, away from direct sunlight and extreme temperatures. Avoid hanging the cord on nails or hooks, as this can cause kinks and damage over time.
Additional Tips for Properly Rolling Up an Extension Cord
In addition to following the step-by-step guide outlined above, here are some additional tips to help you master the art of rolling up an extension cord:
- Avoid Over-Tightening: While it’s important to create a tight coil, be careful not to over-tighten the cord, as this can put unnecessary strain on the wires.
- Label the Cord: Consider labeling each end of the cord (plug and outlet) with a permanent marker to easily identify which end is which.
- Use a Cord Reel: If you find yourself regularly using your extension cord, consider investing in a cord reel for easy storage and access.
- By following these tips and techniques, you can say goodbye to tangles and knots and hello to a neatly coiled extension cord that’s always ready for use.
Conclusion
In conclusion, rolling up an extension cord may seem like a simple task, but doing it correctly can make a world of difference. By following the step-by-step guide and additional tips provided, you can ensure that your extension cord remains organized, accessible, and in good condition for years to come. So, the next time you need to store your cord, remember the importance of transitioning from chaos to order, one coil at a time.